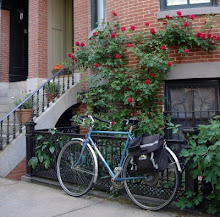
Wow, it has been a LONG time since this blog has had a freebie friday.
In hopes of making up for all that lost time, I would like to offer someone in the Boston area my custom-reinforced Cyclist-themed Bike Rack Wine Box.
For information about the box please see this post with the details and this post with more photos. This box will work best for you if you have a Blackburn rear rack, but should be customizable for another rack. Email me to discuss picking this up for free. *CLAIMED*
Happy Friday everyone!!!
Showing posts with label wine box. Show all posts
Showing posts with label wine box. Show all posts
16 September 2011

30 June 2008
Project Update 2: The Wine Box

OK, so I've secretly been on vacation the last week, with the blog auto-publishing. I'm back now and so rested and happy. So happy, indeed, that we finished the wine box, though there will continue to be tweaking for the foreseeable future.
We decided that the best way to attach it is with four individually tensioned bungee cords. We drilled holes in the box and passed the elastic cording through and tied a knot. It was that easy! It doesn't seem to move forward and back, but I'm in the process of testing how reliable that is. The hardware store didn't have the clip I wanted so this test is one of necessity. So far I've carried about twenty-five pounds in it. The steering gets a bit squirrely with that much weight up high, but that's to be expected. The box itself works great.

The best part is that I don't have to unload the box. I just unhook the bungees and carry the whole thing up my crazy stairs to the apartment. It couldn't be easier!
Update for Melissa: Here you can see a close-up of how it attaches. I covered the raw ends of the bungee with electrical tape so that's the black strips on the tan bungees.

16 June 2008
Project Update 1: The Wine Box

Over the weekend we began the conversion of the wine box I found in the trash. I have to thank my mother-in-law for her help and ideas, she is really good at these projects. Her house is completely customized to her wishes.
 Anyway, first step with the DIY wine box bike basket, for any of you interested, is reinforcing the structural integrity because the staples in the box are not meant to last. As she drilled the holes for the screws she said that one staple had already given way. We used some quarter-round wood that she had in the barn, cut down to box-height, and screwed the panels of the box into this stronger wood.
We haven't decided yet about how to preserve the wood. My husband votes for natural aging, my mother-in-law and other friends vote for oil finish, and I just don't know what I can do. The appeal of a simple polyurethane is that I do it once, it's preserved and done, and I don't have to deal with smelly finishes over and over in my tiny apartment thoughout the heat of summer. The husband's advice is sound in that the box isn't going to degrade immediately and so I can wait and decide over time.
Sadly this box isn't written all in French, or from a winery in my hometown in California, or (like JPTwins' box) from the winery of my father. However the box was free, and it does have a cyclist on it. So I like it.

Stay tuned! The next post will show how we plan to attach it so that I can remove it easily while still filled to overflowing with good things to eat.
13 June 2008
Found a wine box to make my bike basket!
I'm very excited, I've been waiting a year and a half to do this (since we came back from France). This particular box did not contain the very best wine, but it's wooden and was previously on its way to a landfill and will be a perfect prototype project.
Looking into wine box bike baskets, they seem to all be in the front but this box is so large that I think it may need to go on the back. It will be just the thing to pick up my Community Food Share, with a bungee net over the lot.
I'm currently researching how to attach these boxes, here is what I've found so far:
1. A holder basket plus struts, which look nice in that you could bring in the box in bad weather.
2. A nice front rack
Relevant text includes:
3. Perhaps my favorite, from Vélo Vogue, which is very simple with just struts and hooks. It looks like the light is mounted to the underside of the box.

If anyone knows of other inspiration, please comment. I will be sure to post lots of photos of whatever we end up with!
Looking into wine box bike baskets, they seem to all be in the front but this box is so large that I think it may need to go on the back. It will be just the thing to pick up my Community Food Share, with a bungee net over the lot.
I'm currently researching how to attach these boxes, here is what I've found so far:
1. A holder basket plus struts, which look nice in that you could bring in the box in bad weather.
2. A nice front rack
Relevant text includes:
The wine box is fastened to the rack with 8 hefty zip ties which are passed through holes drilled in the box. I reinforced the box with a couple of long square-drive stainless deck screws on each corner as wine boxes are nailed and will probably work loose otherwise. To protect the box from the weather I coated it inside and out with marine grade teak oil left over from another project. An oil finsh can be easily recoated as needed, will allow the wood to weather gracefully to a warm hue over time and won't chip off when banged around. In true Bakfiets style, I also drilled a couple of drain holes at the back, lower end of the box to keep standing water to a minimum when it's left out in the rain.
3. Perhaps my favorite, from Vélo Vogue, which is very simple with just struts and hooks. It looks like the light is mounted to the underside of the box.

Photo from Vélo Vogue.
If anyone knows of other inspiration, please comment. I will be sure to post lots of photos of whatever we end up with!
Subscribe to:
Posts (Atom)